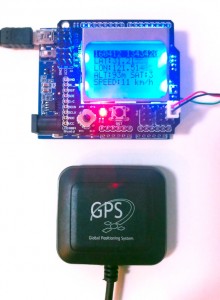
Most common USB GPS receivers come with a USB connector with a UART-to-USB chip built in. That means the GPS receiver itself provides serial UART output. So they can be used with Arduino by replacing it's USB connector with Rx/Tx and VCC/GND connectors. My practical test has proved that this works. What you need to make sure of is the baudrate of the GPS receiver.
3 Comments
Tags
Categories
Search This Site
Categories
What’s New
- Happy Australia Day
- US import tariff to be prepaid on shipping
- Resumption of postal services to the US
- Postal shipping to the US suspended
- Freematics ONE+ Traccar Edition with option of SIM7670E
- Sending custom CAN messages with Freematics ONE+
- Firmware update for Freematics OBD-II Emulator MK2
- Network settings and status via App for Freematics ONE+
- Shifting to u-blox M10 GNSS
- Happy Easter!


[…] modifying a USB GPS receiver to use with Arduino, I continue to make a further attempt to measure distance with Arduino. By pressing the key, […]
can you share the sketch you used to read the tx/rx data from the gps receiver? i have one and would like to try this on my mega as a new user!
The code is nothing special, just using TinyGPS.